forms and validations

Forms and validations are playing a big role in any project. We want to prevent invalid data inputs and teach users to enter data that is appropriate for certain fields.

Let’s take the phone field as an example. The phone field is one of the things you don’t want to see messed up when a package is out for delivery. To keep it valid, we need to add validations for our phone fields on all forms across the site. And the best and easiest way to do this is to describe all our phone fields in XML form, which is provided by the SFCC ecosystem.

The XML form contains all the data necessary to describe and validate one form field (type, error messages, label, validations, and others) in most of the cases.

Let’s Do Some Work

In this post, we will focus on updating the newsletter subscription form provided with the default SFRA code. It is shown on the homepage of your storefront reference webshop.


image


The current newsletter form contains one email field (which is usually enough when it comes to newsletters). But let’s say that our client is using a 3rd party service that requires the first name value if the user wants to subscribe to some additional emails and promotions.

SFRA newsletter form is not using the XML form (I don’t know why), so we will convert it to something more SFCC specific.


Where to Start?

To edit this form, we need to choose which file to override. The file responsible for printing a newsletter form for the home page is homePage.isml (What a surprise! :)). As I have previously mentioned, we can see that it is just a plain form with an email where the button and the code are not relying on SFCC forms at all.

How to figure that out? Well, if the form field name is without a dedicated form field variable in isml, and if in DOM there is no HTML input field name like dwfrm_<form name>_<form field id>, then you are looking at regular HTML forms.


<isdecorate template="common/layout/page">

    <isscript>

        var assets = require('*/cartridge/scripts/assets.js');

        assets.addJs('/js/productTile.js');

        assets.addCss('/css/homePage.css');

    </isscript>


    <div class="home-main homepage">

        <isslot id="home-main-m" description="Main home page slot." context="global" />

    </div>


    <div class="container home-categories homepage">

        <div class="row home-main-categories no-gutters">

            <isslot id="home-categories-m" description="Categories slots on the home page." context="global" />

        </div>

    </div>


    <div class="container home-product-tiles homepage">

        <div class="hp-product-grid" itemtype="http://schema.org/SomeProducts" itemid="#product">

            <isslot id="home-products-m" description="Product tiles on the home page." context="global" />

        </div>

    </div>


    <div class="homepage shop-the-style">

        <isslot id="home-product-set-m" description="Link to a Product Set." context="global" />

    </div>

    <div class="home-email-signup">

        <div class="container">

            <div class="row">

                <div class="col-sm-5">

                    <div class="input-group">

                        <isinclude template="home/components/newsletterForm" />

                    </div>

                </div>

            </div>

        </div>

    </div>

</isdecorate>

The Real Deal - Forms and Validations

Let’s start by making an XML form. Forms are located in SFRA core allowing you to look at them for some reference about field definitions or just jump to the documentation and check it out.


sfra


It is not a new functionality; it is something used from the first pipeline architecture so the documentation describes it nicely.

We need to make the same folder structure in our cartridge. So, let’s add some code in it to describe our fields and rules.

<?xml version="1.0"?>

<form

    xmlns="http://www.demandware.com/xml/form/2008-04-19"

    validation="${require('~/cartridge/scripts/forms/validate/newsletterFormCustomValidate').validate(formgroup);}">

    <field

        formid="firstName"

        label="label.input.firstname.profile"

        type="string"

        mandatory="false"

        binding="firstName"

        max-length="50"

        missing-error="error.message.required"

        range-error="error.message.lessthan50"

    />

    <field

        formid="email"

        label="label.input.email.profile"

        mandatory="true"

        max-length="50"

        regexp="^[\w.%+-]+@[\w.-]+\.[\w]{2,6}$"

        missing-error="error.message.required"

        parse-error="error.message.parse.email.profile.form"

        range-error="error.message.lessthan50"

        type="string"

    />

    <field

        formid="subscribeToSecondEmailList"

        label="description.checkbox.newsletter.subscribe.to.additional.service"

        type="boolean"

    />


    <action formid="subscribe" label="button.form.subscribe" valid-form="true"/>

</form>

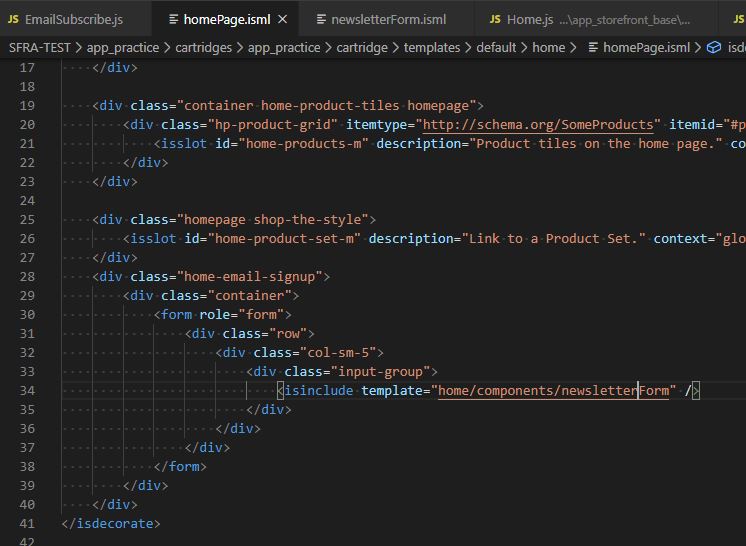
Now we have a basic form that requires a field, and then we can use it in isml and server-side scripting with available SFCC functions.

Some of the fields are mandatory, which means that you need to provide them. I will describe just a few that are “more” important than others.

  • formid - the name of the field which is going to be used to access it
  • type - a field type which is going to be used. We are going to use string and boolean types
  • mandatory - marks the field invalid if there is no value
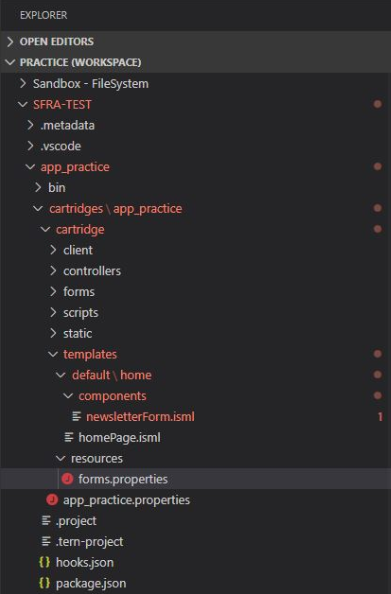
  • label - used as a translation key to show a message beside the input field
  • binding - it is used when we perform coping details to form an object. This is not used here, but is just worth mentioning
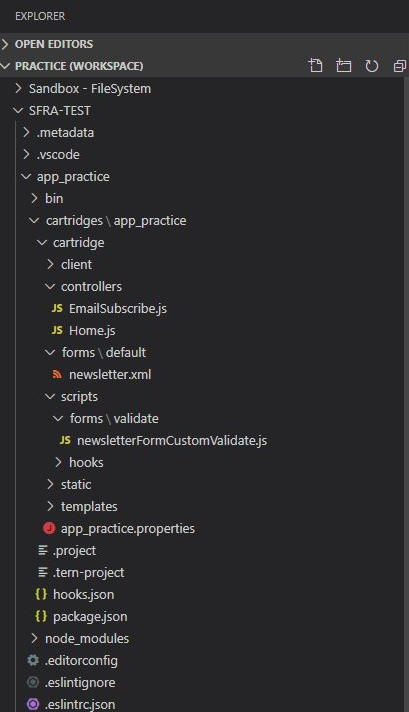
  • validation - path to the custom validation script

There are 2 validation types for form fields we can use. In the first type we can use standard validations like mandatory, min and max length, etc. Those validations will use error labels from attributes missing-error, parse-error, range-error, value-error. Error messages are used per validation they represent, and in sort order provided in the previous sentence when an example custom validation is used.

That takes us to the second type of form and field validations - custom validation scripts. In our example, firstName field is not mandatory, but it becomes mandatory if a checkbox subscribeToSecondEmailList is checked.

To do something like a validation, an attribute is introduced. It should contain a path to the validation script, and one parameter in the function call. The parameter is the “object/context” that is validated. It can be formgroup, and it is used when validation for forms or form groups is performed or formfield for validating simple form fields.

A validator needs to return boolean value or custom dw.web.FormElementValidationResult. If boolean is returned, then messages are used in the order described above. If someone wants to return custom translation, then an instance of FormElementValidationResult needs to be made. Class constructor accepts boolean (success and failure) and message (translation) key.

/* eslint-disable no-undef */

exports.validate = function (form) {

    if (form.subscribeToSecondEmailList.checked && empty(form.firstName.value)) {

        form.firstName.invalidateFormElement('error.firstname.reqired.to.subscribe.to.additional.list');

        return false;

    }

    return true;

};

It is always a good approach to have front-end validation as well, and present some kind of validation response on blur, or something similar to a user. Since we are relying on back-end validation here, I will skip customization for custom relations between fields and keep it simple. We will reuse what SFRA provides.


Preparing Home Controller

Standard Home controller doesn’t push our newly created newsletter form to ISML, so we need to extend it, and add our form to viewData.

Besides form, the code will need to have an action endpoint for an HTML form tag passed from the controller. It can be hardcoded in isml, but I prefer to pass it from a controller.

Therefore two properties are pushed to viewData. They are called forms and formActions

'use strict';

const server = require('server');

server.extend(module.superModule);


server.append('Show', function (req, res, next) {

    const URLUtils = require('dw/web/URLUtils');

    const newsletterForm = server.forms.getForm('newsletter');

    newsletterForm.clear();


    res.setViewData({

        formActions: {

            newsletter: URLUtils.https('EmailSubscribe-Subscribe').toString()

        },

        forms: {

            newsletter: newsletterForm

        }

    });

    next();

});

module.exports = server.exports();

The newsletter form is loaded from the user session and cleared to prevent storing data when the storefront form is submitted. SFCC stores submitted data into session. If we include the same form on the other page, it will be populated on a page load.


Templating

Once the form is declared, the controller passes it to the template. This is when we need to use it somehow.

Starting out from homePage.isml, let’s delete the old form code and make one that includes our shiny new form to make the code cleaner.


homePage


The form structure with all the validation applied (for FE) requires some things like classes as well as data attributes. Older implementations of SFCC had a module called isinputfield which took care of rendering for HTML input elements.

In SFRA we need to define all classes, data attributes, etc. On several projects we reintroduced our custom isinputfield to SFRA because it was more convenient to use. We will go there with SFRA way and add all the required elements in HTML.


sfra


Here we have our subscribe form with 2 input elements and one checkbox. For FE validation we need to print data elements that are used as error messages manually for FE validation. The last row of input field prints attributes like regex, name, etc. from the XML form.

<form

    action="${pdict.formActions.newsletter}"

    class="newsletter-form js-newsletter-form"

    method="POST"

    <isprint value=${pdict.forms.newsletter.attributes} encoding="off" />>

    <isscript>

        let emailRequired = pdict.forms.newsletter.email.mandatory === true;

    </isscript>

    <div class="form-group ${emailRequired ? 'required' : ''}">

        <isprint value="${pdict.forms.newsletter.email.label}" encoding="htmlcontent" />

        <input

            type="text"

            class="form-control"

            autocomplete="off"

            id="${pdict.forms.newsletter.email.htmlName}"

            ${emailRequired ? ' required ' : ''}

            data-range-error="${Resource.msg('error.message.lessthan50', 'forms', null)}"

            data-missing-error="${Resource.msg('error.message.required', 'forms', null)}"

            data-pattern-mismatch="${Resource.msg('error.message.parse.email.profile.form','forms',null)}"

            aria-describedby="form-newsletter-email-error"

            <isprint value=${pdict.forms.newsletter.email.attributes} encoding="off" />>

        <div class="invalid-feedback" id="form-newsletter-email-error"></div>

    </div>


    <isscript>

        let fnameRequired = pdict.forms.newsletter.firstName.mandatory === true;

    </isscript>

    <div class="form-group ${fnameRequired ? 'required' : ''}">

        <isprint value="${pdict.forms.newsletter.firstName.label}" encoding="htmlcontent" />

        <input

            type="text"

            class="form-control"

            autocomplete="off"

            id="${pdict.forms.newsletter.firstName.htmlName}"

            ${fnameRequired ? ' required ' : ''}

            data-missing-error="${Resource.msg('error.message.required', 'forms', null)}"

            data-range-error="${Resource.msg('error.message.lessthan50', 'forms', null)}"

            aria-describedby="form-newsletter-fname-error"

            <isprint value=${pdict.forms.newsletter.firstName.attributes} encoding="off" />>

        <div class="invalid-feedback" id="form-newsletter-fname-error"></div>

    </div>


    <div class="form-group custom-control custom-checkbox">

        <input

            type="checkbox"

            class="custom-control-input"

            value="true"

            name="${pdict.forms.newsletter.subscribeToSecondEmailList.htmlName}"

            id="${pdict.forms.newsletter.subscribeToSecondEmailList.htmlName}"

        />

        <label class="custom-control-label" for="${pdict.forms.newsletter.subscribeToSecondEmailList.htmlName}">

            <isprint value="${pdict.forms.newsletter.subscribeToSecondEmailList.label}" encoding="htmlcontent" />

        </label>

    </div>


    <button type="submit"

        name="${pdict.forms.newsletter.subscribe.htmlName}"

        class="btn btn-primary">

        <isprint value="${Resource.msg(pdict.forms.newsletter.subscribe.label, 'forms', null)}" encoding="htmlcontent" />

    </button>

    <div class="email-description">${Resource.msg('description.form.emailsignup', 'homePage', null)}</div>

</form>

Translations

Every project has a need for static labels that are translated into the appropriate locale. All translations are stored in key/value pairs in .properties files. 

XML forms field label is loading a translation from forms.properties by using a label field as the key. For our form, we have several translations and they are added to forms.properties.


sfra


description.checkbox.newsletter.subscribe.to.additional.service=Subscribe to additional 3rd party service

error.firstname.reqired.to.subscribe.to.additional.list=First name is required to subscribe to additional service

button.form.subscribe=Subscribe

So far we have prepared a newsletter form to be shown for a user on the home page. I won’t focus on styling, and make it too pretty. Let’s just make it fully functional. It should be something similar to this:

shop


Javascript Logic

The old newsletter form was submitted via JS by POSTing data with AJAX. . In order to POST all form fields to the server, we will tackle and adjust the front-end javascript code to make it more generic for some future newsletter forms (in case we add more fields). 

Functionality from SFRA is located in components/footer.js, so we need to rewrite it. Since the footer is loaded from main.js, main.js needs to be overridden, and footer.js reads from our cartridge and not from the base.


sfra


window.jQuery = window.$ = require('jquery');

const processInclude = require('base/util');


$(document).ready(function () {

    processInclude(require('base/components/menu'));

    processInclude(require('base/components/cookie'));

    processInclude(require('base/components/consentTracking'));

    processInclude(require('./components/footer'));

    processInclude(require('base/components/miniCart'));

    processInclude(require('base/components/collapsibleItem'));

    processInclude(require('base/components/search'));

    processInclude(require('base/components/clientSideValidation'));

    processInclude(require('base/components/countrySelector'));

    processInclude(require('base/components/toolTip'));

});


require('base/thirdParty/bootstrap');

require('base/components/spinner');

Footer.js is refactored to be more dynamic with form elements on the newsletter form. HTML form element attributes are used to form XHR request. So, if something is changed in isml (form action, URL, etc.), code will pick it up.

Form validation for FE needs to show error messages from the server underneath the fields. This is why we are going to reuse SFCC formValidation script.

formValidation is expecting form jquery element and the object with key/value pairs where the key is the name of input and the value is an error message which will be shown underneath.

displayMessage function is a bit refactored, but functionality stays similar. It is going to present success or failure message to the user in the form of a small popup.


sfra


'use strict';

const $ = window.$;

const scrollAnimate = require('base/components/scrollAnimate');

const formValidation = require('base/components/formValidation');


let emailSignupT = null;


function displayMessage(data, $form) {

    const $button = $form.find('.js-submit-btn');

    let status = data.success ? 'alert-success' : 'alert-danger';

    let $emailSignupMsg = $('.email-signup-message');


    $.spinner().stop();


    if (!$emailSignupMsg.length) {

        $('body').append('<div class="email-signup-message"></div>');

        $emailSignupMsg = $('.email-signup-message');

    }


    $emailSignupMsg.html('<div class="email-signup-alert text-center ' + status + '">' + data.msg + '</div>');


    clearTimeout(emailSignupT);

    emailSignupT = setTimeout(function () {

        $emailSignupMsg.remove();

        $button.removeAttr('disabled');

    }, 3000);

}


module.exports = function () {

    $('.js-newsletter-form').on('submit', function (e) {

        e.preventDefault();

        $.spinner().start();

        const $form = $(this);

        const $submitBtn = $form.find('.js-submit-btn');


        $submitBtn.attr('disabled', true);


        $.ajax({

            url: $form.attr('action'),

            type: $form.attr('method'),

            data: $form.serialize(),

            success: function (data) {

                formValidation($form, data);

                displayMessage(data, $form);

            },

            error: function (err) {

                formValidation($form, err);

                displayMessage(err, $form);

            }

        });

    });


    $('.back-to-top').on('click', scrollAnimate);

};

I want newsletters! The Controller

Although EmailSubscribe controller code is refactored, it is preserving similar functionality from the core. We can see that check if the form is valid to rely completely on SFCC. This means that we don’t have to do any kind of custom validation here for each field separately.

Email is validated by FE and BE described in newsletter.xml. Besides returning just messages we want to show field errors on the newsletter form to a user. Fields are returned as an additional parameter, and formErrors core script will return key/value mapping of field name and error message back if the field is invalid. This is important for JS so that it can print errors underneath the form elements.


sfra


'use strict';

const server = require('server');


server.extend(module.superModule);


server.replace('Subscribe', function (req, res, next) {

    const Resource = require('dw/web/Resource');

    const newsletterForm = server.forms.getForm('newsletter');

    const formErrors = require('*/cartridge/scripts/formErrors');

    const hooksHelper = require('*/cartridge/scripts/helpers/hooks');


    res.json({

        success: false,

        fields: formErrors.getFormErrors(newsletterForm),

        msg: Resource.msg(

            newsletterForm.firstName.valid ? 'subscribe.email.invalid' : 'error.firstname.reqired.to.subscribe.to.additional.list', 'forms', null

        )

    });


    if (newsletterForm.valid) {

        hooksHelper('app.mailingList.subscribe', 'subscribe', [newsletterForm.email.value], function () {});

        res.json({

            success: true,

            msg: Resource.msg('subscribe.email.success', 'homePage', null)

        });

        return next();

    }

    return next();

});

module.exports = server.exports();


This is how response from server looks like in case of an invalid form element:


preview


This was just a basic example of how we can use form XML and do BE validations for our code. Keeping most of the validations in XML form will give us cleaner codebase and more reusable parts in our application. This is really helpful if we use multiple sites and locales where some fields like phone, postal code, and others are validated differently per locale.

Here is a short video of the form and how it works.

If you have any questions and doubts, we will be happy to help you with your SFCC implementations. Feel free to reach out.